Hi All
I am so happy to have you back again with me, Renee, as I share with you, my latest creations for Sticker Monday at Stamplorations. I am having a slight problem responding to comments which I am trying to sort out with my blog... I hope I can get it done soon. But anyway I know you are going to love this week's presentation....
For Part 1 of September's exciting feature...I am using the clear Stamplorations stickers as BORDERs.......
Excited!!!!!well let's look at this week's three cards at a glance .
Card #1
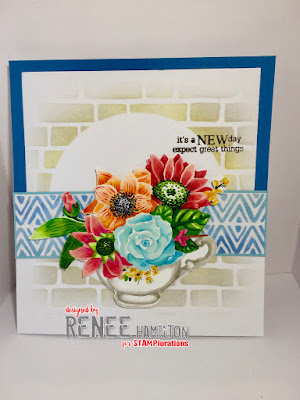
THE MIDDLE BORDER
For this card, I began by creating the background using stamplorations brick wall stencil which I masked with a circle and distressed using Ranger's distress ink in mustard seed and Simon Says stamp in fog.
Then I used the Artsy Geometric Background sticker to bring visual interest as a border placed midway on the card which added a touch of blue to the background; connecting with the blue rose in the "cup of blooms #3" stamp. The sticker was first adhered to white cardstock and cut out and matted on light blue cardstock.
Here is the card again....
Card #2
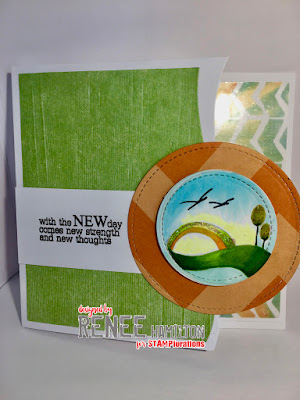
THE BORDER'S EDGE
Another way to embellish and add interest to your cards is to cut the top part of the card narrower than the bottom part and add a coloured border.
Here is the artsy geometric background sticker again, which I adhered to white cardstock to make it easier to create that border's edge on the inside of the card. Isn't that cool???
For the foreground of the card, I coloured up Stamplorations New Beginning Stamp , which I matted on an orange piece of cardstock and added one of the beautiful messages from the same stamp on the front of the card.
Here is the card again......
Card #3
THE CIRCULAR BORDER
A circular border of text using the Happy Happy clear stickers by Stamplorations was probably the most fun way...that I have used these clear stamps.....
For me.... adhering the stickers to white cardstock and cutting them out makes it easier for me to manipulate and for this card....it worked out great.
The stickers were stuck down in a circular fashion to the front of the card and then diecut using a circular die on my sizzix die cut machine. I had to run it through a few times and use my EK success scissors to cut off the pieces that didnt quite cut with the machine. I cut a small hole in the last sticker and threaded a pink and white twine through it and stuck it on the inside of the card so the message turns and twirls.
Using two circular dies , I nested them together to cut out the border and added to cute butterflies as embellishments.
Here is the card again
Hope you enjoyed this week's featured cards and I will be back here on Monday 29th September with another creative Sticker Monday Feature.
Don't forget to comment on this blog Sweet Cherry Cards Blog and on the Stamplorations Blog for a chance to win yourself a $15 Gift Code. Good luck and see you here next week!


Comments
Love the artsy geometric band on the first
card. tfs!
the stickers. Love
the second card.
Carla from Utah